AAMToolbox template
Jump to navigation
Jump to search
Template Editor
1) Start a new project from the AAMToolbox control panel
Tutorial on starting a new project
Notice that one of the images copied into the project has been co-opted as an icon representing the project.
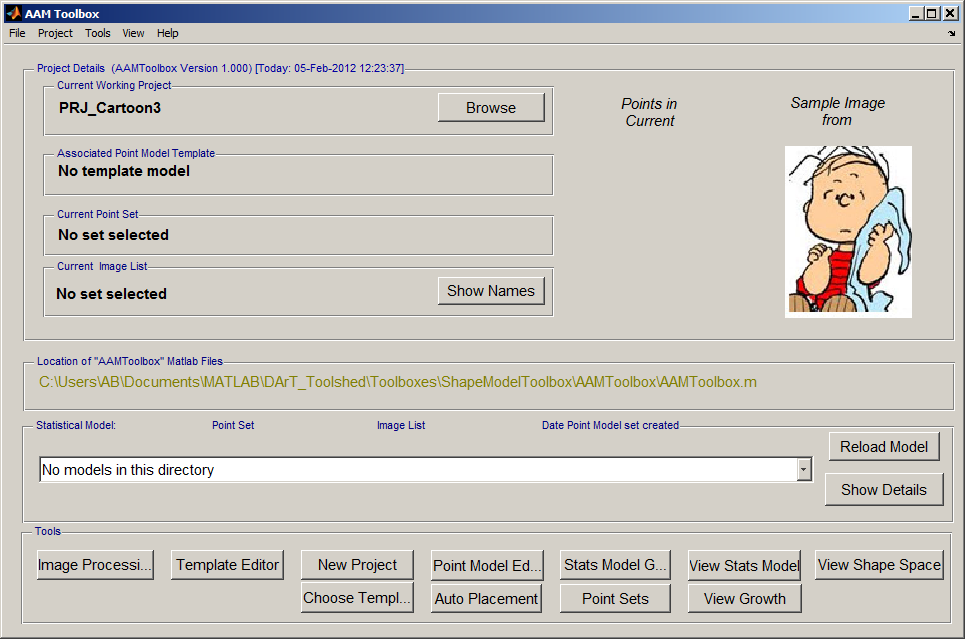
Once the template has been added, a second icon will be automatically created that represents the template itself.
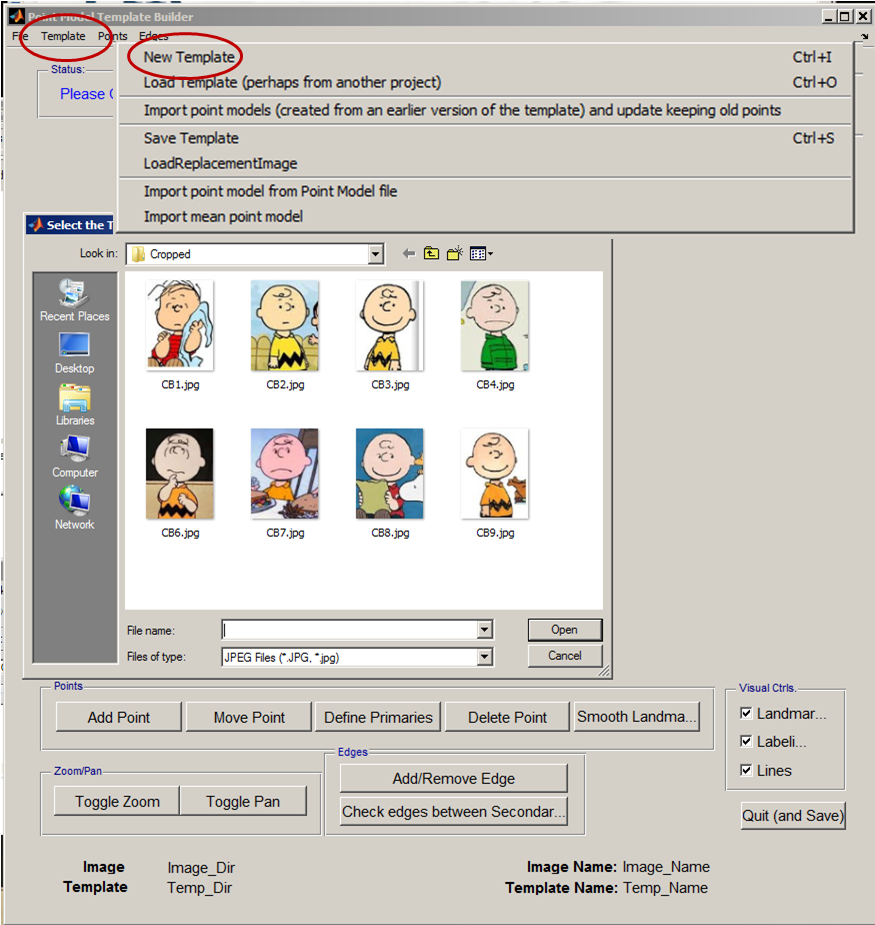
2) Select an image on which to base the template
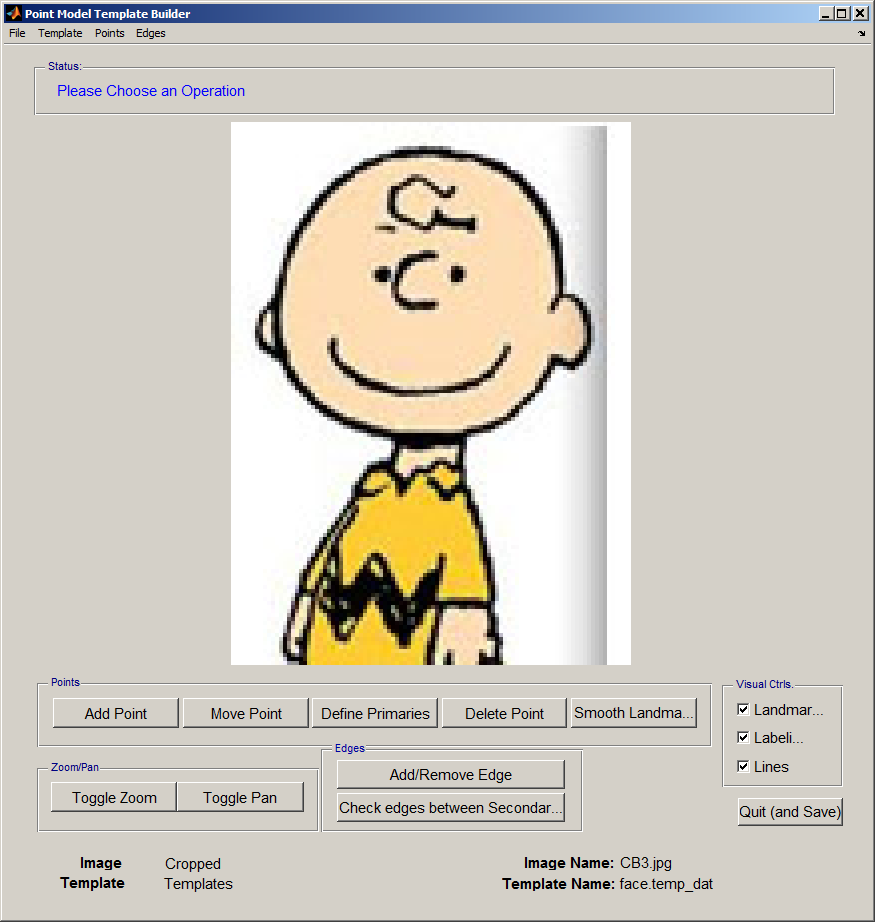
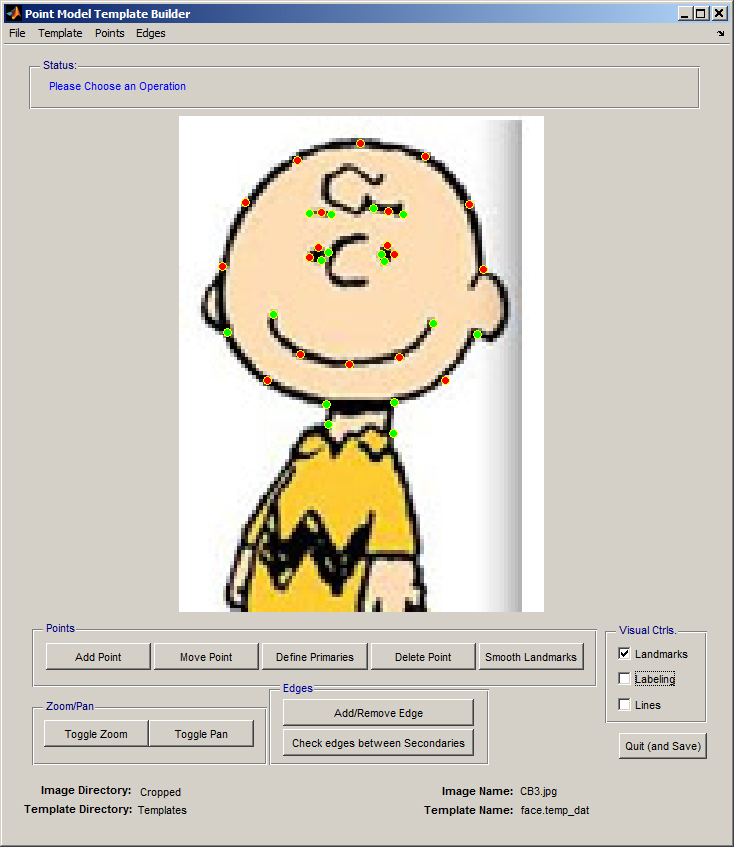
3) Create a new Template using the Template Editor
4) Choose a template using the AAMToolbox control panel
Having created a template it should be selected using the AAMToolbox main interface, 'Choose Template'.
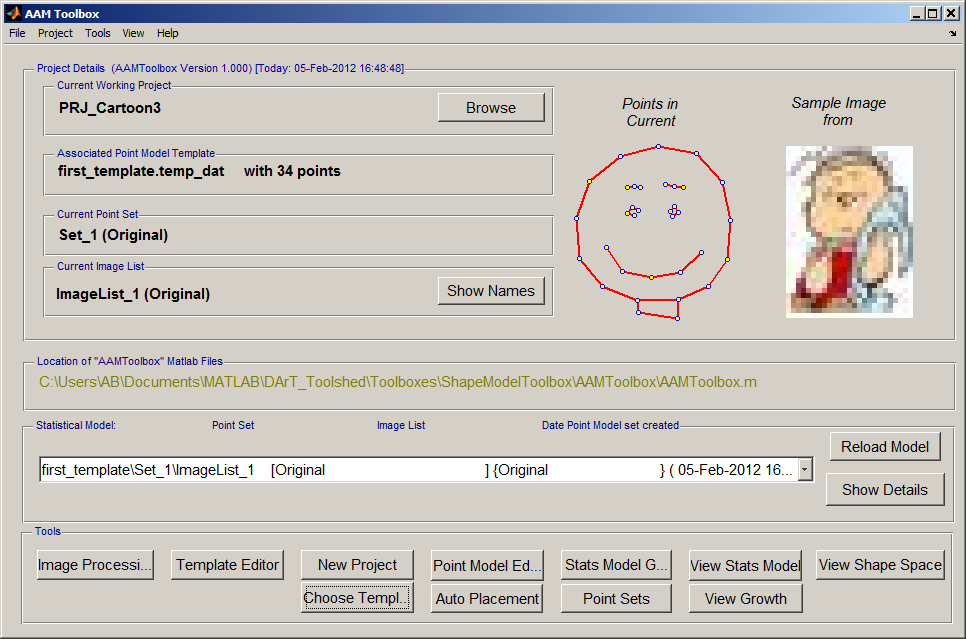
Once the template has been added, a second icon will be automatically created that represents the template itself. Here it is the red smiling face.
Notice:
- The name of the current working project, top left
- The template name together with the number of points
- The current set of points (that will be selected automatically)
- The current list of images (that will be selected automatically)
- Most importantly, these details are summarised in the Listbox. Each model that is created will be associated with an entry in this listbox.
- The next step is to move the point model into position over each of the images using the Point Model Editor.
